RAPIX Integrator version 11 is a major new release.
Major new functions in this release are significantly improved floor plan support, and support for configuring the new RAPIX Facilities software.
The sections below detail some of the new features and capabilities.
Configuration for RAPIX Facilities
The configuration for RAPIX Facilities is performed in RAPIX Integrator. This allows RAPIX Facilities to use all of the information that exists in the RAPIX Integrator project. The result of this is that very little additional effort is needed in order to be able to use RAPIX Facilities.
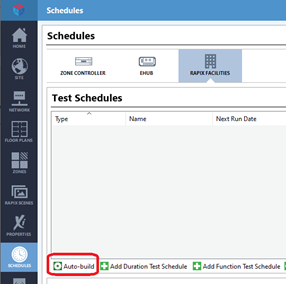
Creating RAPIX Facilities Test Schedules
To define test schedules for RAPIX Facilities, select the Schedules tab, then the RAPIX Facilities tab.
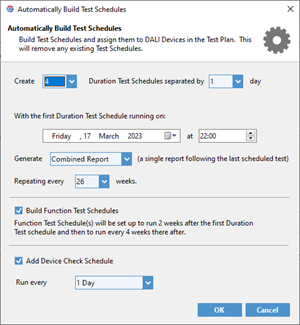
The easiest way to create the test schedules is to click on the Auto Build button.
Select the required settings, then click on OK.
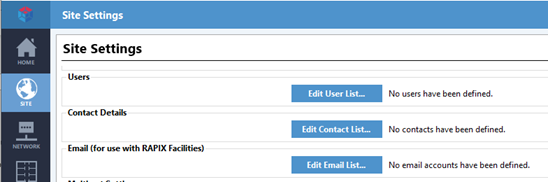
Set RAPIX Facilities Email Details
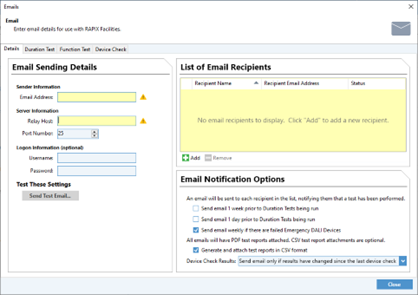
When RAPIX Facilities performs a test, it can email the results to one or more email accounts. To configure the email details, select the Site tab then click on the Edit Email List button.
Enter the details of the email server and the email recipients.
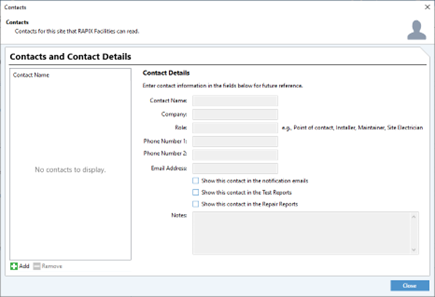
Set RAPIX Facilities User Details
It is useful, but not essential, to add details of companies or people related to managing or maintaining the site. To do this, select the Site tab, then click on the Edit Contact List button. Add contacts as required.
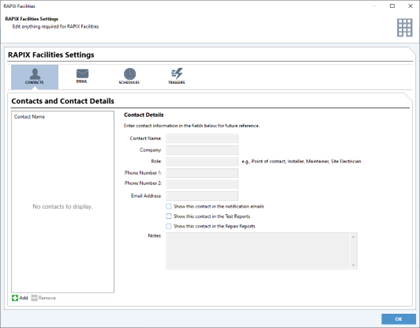
The RAPIX Facilities Form
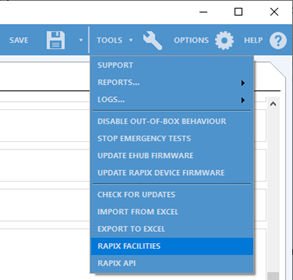
An alternative way to access the configuration for RAPIX Facilities is to select the Tools menu RAPIX Facilities menu item.
The RAPIX Facilities form contains the same settings as discussed above, but in one convenient location.
Running RAPIX Facilities
The RAPIX Integrator project can be opened in RAPIX Facilities and it will automatically run the scheduled tests and send the results to the configured email addresses. Please refer to the RAPIX Facilities help file for details of installation and operation.
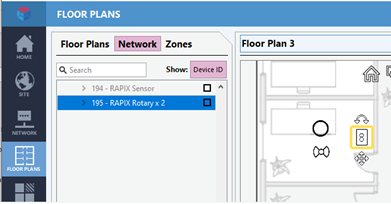
RAPIX Integrator Floor Plans
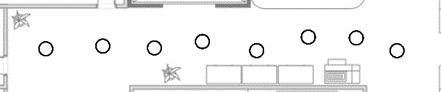
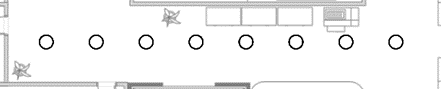
Floor plans can now show RAPIX devices, such as buttons and sensors:
There are many options for aligning a set of selected symbols. The “Auto Arrange” option will generally do exactly what you need.
Before:
After:
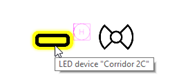
Hovering the mouse over a device symbol on the floor plan will show basic information:
Right-click on a device brings up a menu of options:
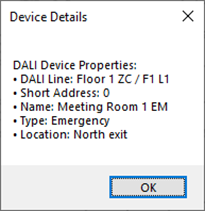
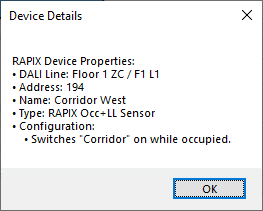
The Details menu item shows a summary of the device:
Importing User Changes to Scenes or Schedules
If a user edits a site’s scenes or schedules using RAPIX Desktop or RAPIX Facilities, the changes are stored in the Zone Controller. When the project is next opened in RAPIX Integrator, you will be shown a list of the things that the user has changed, and be given the option to accept the changes (merging them into the project) or reject them (changing them back to how they originally were).
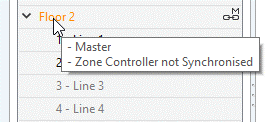
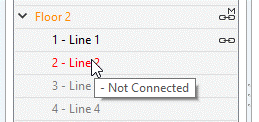
Working with Remote Sites
When commissioning or maintaining a remote site, it is now possible to select an alternative URL for connecting to a RAPIX Zone Controller or RAPIX Ethernet Interface:
This website uses cookies to improve your experience. We'll assume you're ok with this, but you can opt-out if you wish. Cookie settingsAcceptRejectRead More
Privacy & Cookies Policy
Privacy Overview
This website uses cookies to improve your experience while you navigate through the website. Out of these cookies, the cookies that are categorized as necessary are stored on your browser as they are essential for the working of basic functionalities of the website. We also use third-party cookies that help us analyze and understand how you use this website. These cookies will be stored in your browser only with your consent. You also have the option to opt-out of these cookies. But opting out of some of these cookies may have an effect on your browsing experience.